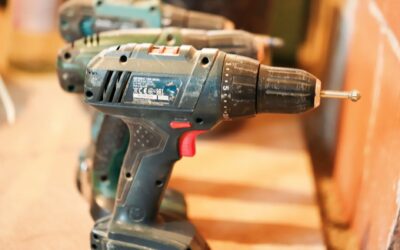
If a drill bit is stuck in your drill, the most common cause is a seized chuck or a jammed bit due to overtightening. This usually happens when the chuck (the part that holds the bit) becomes locked from debris, rust, or excessive force. Before reaching for tools, try reversing the drill direction and gripping the chuck firmly. If that does not work, the issue often requires a simple mechanical trick to free the bit without damaging your drill.
Overtightening the Chuck
The most frequent reason a drill bit gets stuck is overtightening the chuck by hand. Many users crank the chuck collar as hard as possible, which can cause the internal jaws to bind against the bit shank. When you later try to loosen it, the same force works against you.
To fix this, grip the chuck firmly with one hand while using your other hand to rotate the bit itself. Sometimes a simple twist in the opposite direction is all it takes. If the chuck is keyless, ensure you are turning it in the correct direction (usually counterclockwise to loosen).
Rust or Corrosion on the Chuck or Bit
Moisture can cause rust to form between the drill bit shank and the chuck jaws, locking them together. This is common in drills stored in damp basements, garages, or toolboxes without proper ventilation. Even a small amount of corrosion can create a tight bond that resists normal loosening.
Apply a penetrating oil like WD-40 or a rust dissolver around the chuck opening where the bit enters. Let it sit for a few minutes, then try to loosen the chuck again. For stubborn rust, tapping the chuck lightly with a hammer can help break the bond.
Debris or Metal Shavings Inside the Chuck
Drilling produces fine metal shavings, dust, and debris that can work their way into the chuck mechanism. Over time, this buildup can jam the jaws, preventing them from opening or closing properly. If you have been drilling without a vacuum or dust collection, this is a likely culprit.
First, try blowing compressed air into the chuck opening while turning the collar. This can dislodge loose debris. If that fails, remove the chuck if possible (many are screw-mounted) and clean it with a brush and solvent. Always dry and lubricate the chuck before reassembling.
Damaged or Worn Chuck Jaws
Chuck jaws are precision components that can wear down or become damaged over time. If the jaws are chipped, bent, or uneven, they may grip the bit asymmetrically and refuse to release. This is more common in older drills or those that have been dropped.
Inspect the chuck visually by opening it fully. If you see visible damage, the chuck likely needs replacement. Many drills have replaceable chucks, and a new one can restore normal function. Until then, you may need to use a wrench or pliers to manually force the chuck open, but be careful not to damage the drill further.
Frozen or Sealed Chuck from Lack of Use
If a drill sits unused for months or years, the chuck can seize from a combination of dried grease, dust, and light corrosion. The mechanism becomes stiff, and the jaws may lock in place. This is especially common in drills stored with a bit still inserted.
Apply penetrating oil generously and let it soak overnight. Then, use a pair of pliers or a wrench to gently work the chuck collar back and forth. Patience is key; forcing it can crack the chuck housing. Once freed, clean and lubricate the chuck to prevent recurrence.
Using the Wrong Chuck Key or Tool
Keyed chucks require a specific key to tighten and loosen. If you lose the original key and use a substitute like a screwdriver or Allen wrench, you may not get the proper leverage or alignment. This can cause the chuck to bind or the key to slip, leaving the bit stuck.
Always use the correct chuck key that came with the drill. If it is lost, order a replacement from the manufacturer or find a universal key that fits. Using the wrong tool can damage the chuck teeth, making future removals even harder.
How to Free a Stuck Drill Bit
- Reverse the drill direction and grip the chuck firmly while twisting the bit.
- Apply penetrating oil around the chuck opening and let it sit for several minutes.
- Use compressed air to blow out debris from the chuck.
- Tap the chuck lightly with a hammer to break rust or corrosion bonds.
- If all else fails, remove the chuck entirely (if possible) and replace it.
If your drill continues to have chuck issues after freeing the bit, it may be time to consider a replacement.
Frequently Asked Questions
Can I use heat to loosen a stuck drill bit?
Heat can expand metal and break a rust bond, but it risks damaging the drill’s plastic housing or internal components. Only use heat as a last resort, and apply it directly to the bit shank with a heat gun, not a torch. Keep a fire extinguisher nearby.
Will WD-40 damage my drill’s chuck?
WD-40 is safe for most metal chucks and can help loosen rust and debris. However, it is not a long-term lubricant. After freeing the bit, clean the chuck and apply a light machine oil to prevent future sticking.
How do I prevent a drill bit from getting stuck in the future?
Always tighten the chuck just enough to hold the bit securely, not with maximum force. Keep the chuck clean and dry, and apply a drop of oil periodically. Remove the bit after each use to prevent corrosion from setting in.
Should I replace the chuck if it keeps jamming?
Yes, if the chuck repeatedly sticks despite cleaning and lubrication, the internal jaws may be worn or damaged. Replacing the chuck is often cheaper than buying a new drill and restores reliable performance. Check your drill’s manual for replacement instructions.
Can I use a wrench to force the chuck open?
You can use a wrench on the chuck collar as a last resort, but be careful not to damage the collar’s knurling or the drill’s spindle. Apply steady, gentle force rather than jerking. If the chuck does not budge, apply more penetrating oil and wait.
Related Guides
Final Thoughts
A drill bit stuck in your drill is usually caused by overtightening, rust, or debris, and most cases can be resolved with penetrating oil, patience, and the right technique. If your drill continues to give you trouble, it may be time to look for a more reliable model.